Unlocking the Godox iM30Pro's Secret: Maximizing Miniature Strobe Potential for Intimate Product Photography
- Sinisa Zec Studio
- No Comments
- Photography, Tutorials & Techniques
I see it all the time. Small brands with fantastic products, but their photos fall flat. The lighting is either a blurry, soft mess from a window or harsh and uncontrolled from a cheap LED. It’s a problem of scale. You don’t need a massive studio light to shoot a watch, a bottle of perfume, or a piece of jewelry. You need control. And that’s where a new breed of miniature strobes, like the Godox iM30Pro, starts to make a lot of sense.
The Short Answer: To maximize the Godox iM30Pro for intimate product photography, you must get it off the camera and use it with small, precise modifiers. Its low power range (down to 1/128) and compact size allow for surgical light placement that larger strobes can’t achieve, creating defined shadows and highlights on small subjects.
Why Go Small? The Case for the Miniature Strobe
For years, the industry has been obsessed with more power, bigger modifiers, softer light. And for portraits, that often makes sense. But in the world of small products, that thinking is a liability. When I’m shooting with my Sigma 105mm f/2.8 Macro, my working distance is tiny. My subject is small. A huge softbox just wraps light everywhere, killing texture and shape. It creates flat, boring images.
A tiny light source, however, acts like a precision instrument. Its small size relative to the subject creates harder, more defined shadows that reveal texture and form. Think about the texture on a leather watch strap or the facets of a gemstone. You need crisp, defined light to make those details pop. A miniature strobe gives you that control. You can place it inches from your subject, creating dramatic falloff that a bigger light physically can’t manage.
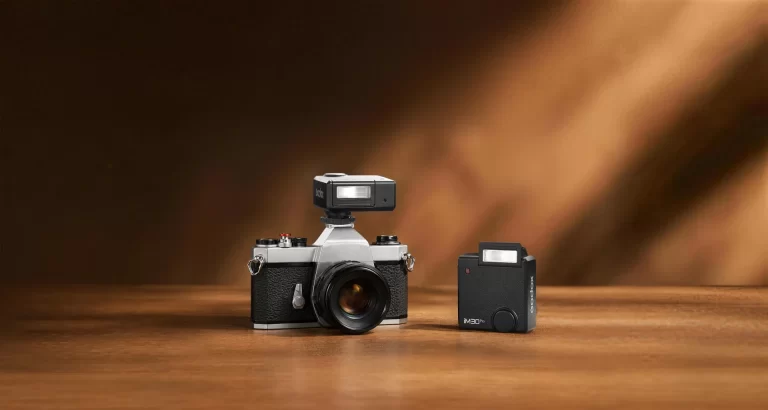
And let’s be practical. If you’re a small brand or a solo photographer, you probably don’t have a massive studio space. A light like the iM30Pro, weighing just 121g, can be mounted anywhere with a simple clamp. It doesn’t require a heavy-duty C-stand. It’s efficient, portable, and forces you to think more creatively about light placement.
How Do I Actually Use the Godox iM30Pro for Product Shots?
Looking at the specs for the Godox iM30Pro, it has exactly what’s needed for this kind of work: manual control down to 1/128 power, optical slave modes, and a compact head. So, let’s put that theory into practice. Here’s the workflow I would use to take this little light and produce high-end results.
Step 1: Get It Off The Camera. Immediately.
This is non-negotiable. On-camera flash for product photography is a recipe for disaster. It creates flat, deer-in-the-headlights images with ugly reflections. The first thing you must do is get the strobe off the camera and onto a light stand or a small clamp.
The iM30Pro gives you two easy ways to do this without buying expensive radio triggers. The optical S1 and S2 slave modes mean the flash can be triggered by another flash firing. You can use your camera’s pop-up flash (on its lowest power setting) to trigger the iM30Pro. S1 mode fires when it sees any flash; S2 mode intelligently ignores the pre-flash from a TTL system. For wired reliability—something I learned to value from my days in the print shop where mistakes cost real money—the 2.5mm sync port is a welcome feature.
Step 2: Forget Big Softboxes. Think Small & Hard.
Your goal is to control the light, not just soften it. A small source creates a harder, more specular light. This is what gives reflective surfaces their gleam and textures their depth. But a bare flash can be too harsh, creating blown-out highlights—a classic mistake on shiny products.
So we modify, but on a small scale.
- DIY Snoot: Roll a piece of black cardstock into a cone and tape it around the flash head. This funnels the light into a tight, focused beam, perfect for isolating one part of a product, like a logo or a watch face.
- Small Bounce Card: Use a small white business card or piece of foam core held near the flash with a clamp. This creates a slightly larger, softer source than the bare flash but is still small enough to be precise. The tilting head on the iM30Pro is ideal for this, allowing you to aim the flash directly into your bounce card.
- Grid Spot: While not included, you can easily fashion a small grid out of black straws to create a tight, directional beam with soft edges.
The point is to shape the light with intent, not just throw a giant diffuser at it and hope for the best.
Step 3: The Classic One-Light Setup (with a Twist)
This is where you start. Place your product on a clean surface. Position your iM30Pro, modified with a small snoot or bounce card, to one side—about a 45-degree angle from the camera and slightly above the product. This is your key light.
On the opposite side, place a white reflector (a simple piece of white card or foam core works). This will bounce some of the light from the strobe back into the shadows, softening them just enough so they aren’t pure black. You can control the intensity of the shadows by moving the reflector closer or further away.
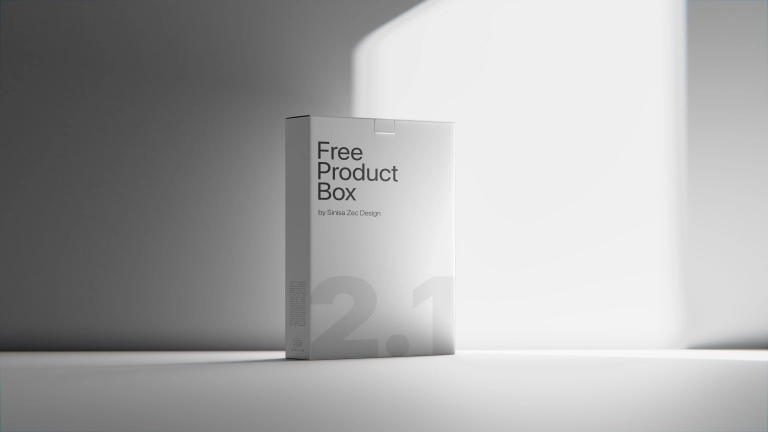
This simple setup creates dimension and shape. It’s the foundation of good product photography. And once you have the shot, you can present it professionally using a template like my Product Box Free Mockup to show clients how it will look in a real-world context.
Step 4: Adding Dimension with a Second Light
Once you’ve mastered the single light, adding a second iM30Pro (or any small manual flash) opens up new possibilities. The most common use is a rim light or separator light.
Position this second flash behind the product, opposite the camera, and aim it back towards the edge of the product. Keep the power very low. This creates a thin, bright highlight along the edge, separating the product from the background and giving it a three-dimensional, professional look. Using the S1/S2 optical slave mode makes this incredibly simple; your key light triggers the rim light automatically.
Step 5: Painting with Color Using Magnetic Gels
The iM30Pro’s support for the Godox MA01 magnetic color filters is a fantastic creative feature. Instead of a plain white or black background, you can use a second strobe with a colored gel to add a splash of color and mood.
Place the gelled strobe on a low power setting and aim it at your background. A deep blue or a warm orange can completely change the feel of an image. You can also use gels on your key light for more stylized, editorial looks. Understanding how to use complementary or analogous colors here is key—it’s a fundamental principle of design that you can learn more about from resources like the Adobe Color guide. This is where photography meets graphic design, creating a cohesive visual identity for a brand.
Godox iM30Pro Technical Specifications
| Feature | Specification |
|---|---|
| Product Name | iFlash Camera Flash |
| Model | iM30Pro |
| Flash Modes | Manual (M), AUTO (Automatic) |
| Guide Number (GN) | 15 (m ISO 100) / 49.2′ (ft ISO 100) |
| Flash Output Power Range | 1/128 to 1/1 (full power) |
| Power Adjustment Step | 1/3 stop increments |
| Flash Times (1/1 full power) | Approximately 550 |
| Recycle Time | Approximately 0.1 – 1.5 seconds |
| Built-in Lithium Battery | 7.4V / 700mAh |
| Charging | USB-C |
| Power Saving | Standby / Auto Power Off supported |
| Sync Triggering Methods | Hot Shoe, Photocell (Optical S1/S2), 2.5mm Sync Port |
| Hot Shoe Type | Single-contact universal hot shoe |
| Flash Head | Adjustable/Tilting |
| Tilt Angles | 45°, 60°, 75°, and 90° |
| Swivel/Horizontal Adjustment | No |
| Secondary Illumination | No |
| Display | High-definition color screen |
| Magnetic Accessory Mount | Yes (for Godox MA01 magnetic color filters) |
| Working Environment Temperature | -10°C to 45°C |
| Dimensions (W x H x D) | 62 × 64 × 48mm / 2.4 x 2.5 x 1.9 inches |
| Net Weight | Approximately 121g / 4.3 oz |
Check Current Prices & Availability
Gear pricing fluctuates constantly. If you are seriously considering adding this to your kit, check the current retail stock and pricing through the links below:
The Bottom Line
- Control Over Power: For small products, a low-power, precise light source is more valuable than a high-power one. The iM30Pro’s 1/128 power setting is its most important feature for this work.
- Get Off-Camera or Go Home: The single biggest improvement you can make to your product shots is moving your light source. This strobe’s built-in optical slave modes make that accessible to everyone, even without radio triggers.
- Technique Trumps Gear: A $45 strobe used with intent and a few pieces of cardboard can produce better results than a $1000 strobe used poorly. It’s about knowing how to shape light, not how much light you can make.
Photo by dlxmedia.hu on Unsplash.
Frequently Asked Questions
Is a Guide Number of 15 strong enough for product photography?
A:Yes, absolutely. For tabletop and macro work, you’re working at very close distances and often with smaller apertures for depth of field. A high Guide Number is irrelevant; you need a low minimum power for fine control, which this flash provides.
Can I use the Godox iM30Pro with my Godox X-series radio triggers?
A:No. Based on the specifications, the iM30Pro does not have a built-in 2.4GHz radio receiver. You must trigger it via the hot shoe, the optical slave modes (S1/S2), or by a wired connection to its 2.5mm sync port.
Will the single-contact hot shoe work with my camera’s TTL metering?
A:No. A single-contact hot shoe is universal for firing the flash in manual mode only. It does not transmit TTL exposure information. While the flash has a Smart AUTO mode, it’s a self-contained calculation, not a communication with your camera’s meter.